The Journey
I've always liked watching DIY videos. Especially the woodworking type. It's always interesting, to me, to see how it's done. Whatever "it" is. The idea came to me that it might be a good learning process to document my own creative process. It's not that I think it's particularly illuminating for anyone else. It just felt like a good idea.
So what follows on this page is my latest project, and the journey, from concept, through execution, and finally, completion.
For some reason, making frames is a little trickier than I'd like it to be. I suspect the culprit to be math. Math and I are not on good terms, and never have been. The process to correctly fit a frame, with the correct rabbet cut into it, is a very "math" thing. It makes my head buzz, and I make mistake after mistake. So, it's the fault of math.
I was once watching a DIY woodworking video and the creator flat out said he makes the frames for art and then modifies the art to fit the frame, rather than the other way around. This struck me as the stuff of genius. I immediately adopted this philosophy.
Henceforth, I will build the frame first, and then build the canvas stretcher to fit. (Wile E Coyote, Genius)
Little Sugar Creek runs through our farm, and it's one of our favorite things about the place. I've photographed it from every conceivable angle and time of day. I'd never painted a picture of it though.
This is the process of how I came to rectify that oversight.
The first step, as I've made abundantly clear, is to build out the frame. There was a spot on our wall just begging for this painting, so I knew I needed to be at least 8 feet wide, and around the 3-foot mark in height. I had a photograph of our favorite swimming hole to work from and I cropped it to match the ratio.
Then it was time to build.


Once the fit is right, and the canvas is stretched, it's time to gesso the canvas, and paint / stain the frame. I had a couple of ideas in my mind about how this painting was going to work, and I know there is going to be quite of bit of back and forth between me and the painting, but I planned to remain true to the original concept. That gave me some confidence in deciding the frame color. The room is a little dark, so I wanted a bright and eye-catching color.
So - It's built out now and it's time to get to painting. I like to get the general layout of the painting drawn in immediately.


I initially draw the concept directly to the canvas, then I'll usually paint the entire surface with a neutral tone to help me not get overwhelmed immediately with mid-tones.
This process also lends itself to other light vs dark decisions that will come down the road. It frees you up to get right to work on the "big patches". That's an artist term you need not concern yourself with. Technical stuff.


At this point, the normal painting studio (actually a corner of our farm shed) was getting a little too hot to work in. Summer was coming on.
My wife and I share a creation space in our house that we keep music instruments, audio/video equipment, and all sorts of art related paraphernalia in. It's a fun space to paint, draw, goof off, read, or any other fun hobby you want.
It is also graced with a truly horrific shag carpet from the early 70's. We covered it in some cheap rugs, but the upshot is that we don't much care if a little paint drips on to it. At least not yet. So I decamped from the shop and moved everything into the house. God bless AC.

You can tell I'm starting to work in more naturalistic elements. I won't say this is a photographic representation of the river, but rather it's more interpretive. It is how I see it in my mind's eye, and I'm allowing myself the freedom to experiment in many directions over the surface of this large work.
I can paint over what doesn't work, and I truly believe that every layer, even the mistakes, will add to the fullness of the painting at the end. Little bits of color or line work will show through and enhance the interest, in my opinion, so I welcome the changes.

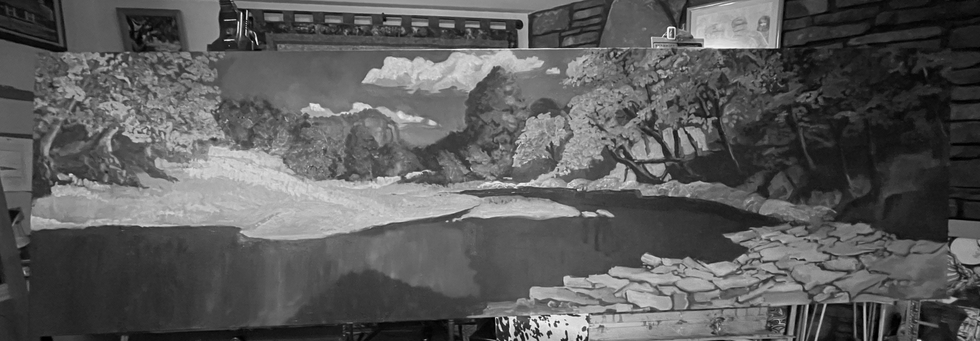
Periodically I find it helpful to photograph the work in black and white. In a completely desaturated state, I think it helps me judge the composition and the light/medium/dark elements for balance and overall composition.
It's just about time to enter the final stages, where I decide to get some detail into the mid and foreground.
This was a very important project for me. I can't emphasize how important this location is to our family. We've done a lot of swimming, socializing, and general creek-side activities here. We love this rock outcropping you see in the lower right. Some of our happiest times were right here looking at the view you see.

It's starting to come together, and I'm just about finished. If you look you can even see the photo I'm painting from taped at the bottom. I used printouts for reference. It helps me keep on track and I need the light references, so I don't forget what the sun is doing. From here, it's just a matter of attaching the frame.

In the words of the great Eddie Izzard, "ET VOILA!"


Thanks for coming along on the journey with me.